
The pull-up. It’s a hallmark for any fitness enthusiast. There is just something about it that feels so powerful. Being able to pull your own bodyweight up through the air is a good skill to have, and I often picture the many emergency situations where this skill will come in handy. Because I’m insane and plan for the worst case scenario always. Seriously, it’s terrible, I should stop that.
That doesn’t make the pull-up any less awesome though! Many of us, especially women who just naturally have less upper body strength than men, have tried to do pull-ups to no avail. Even with strengthening your back with a hundred dumbbell exercises it can still feel like the distance between where you are now, and doing an actual pull-up is too large to overcome.
It’s certainly not easy, but it is far from impossible. Many years ago, my one major fitness goal was to do a pull-up. I would work at it for weeks and weeks and then test it out on the pull-up bar and be so embarrassed when I just hung there struggling and get frustrated and give up trying. With this haphazard method, you can imagine that I didn’t get very far and I started to think it was just never going to happen for me.
It wasn’t until a couple of years ago that I decided I was going to make the pull-up mine. And here is the progression of how I finally nailed pull-ups:
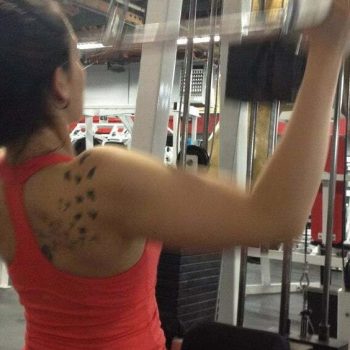
Lat Pulldown: Both close grip and wide grip pulldowns will definitely help to strengthen your lats, the major working muscle in a pull-up. Be sure to incorporate some type of pulldown in every back workout that you do. Many people, especially beginners, workout using a 10-15 rep range a large portion of the time. However, in order to learn how to do a pull-up, realistically, you’re going to only be able to do one the first time, so it is a good idea to getting your muscles strong enough to be able to do just one. One of the ways to accomplish this is to not be afraid to work in the lower rep ranges, anywhere from 3-8 reps, alt least for a couple sets per week.
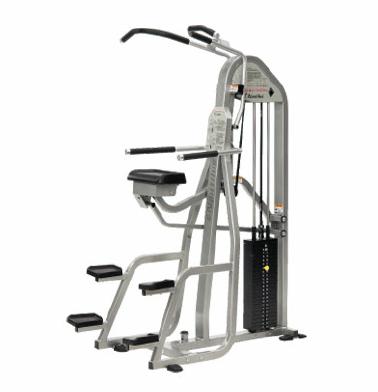 Assisted Pull-up Machine/Gravitron: The Gravitron machine was what I originally thought would be my ticket to pull-up city. An assisted pull-up machine allows you to select a weight on the cable stack and it offers you that much assistance with pulling up your body weight. For example, a 150 pound person who selects 80 pounds on the cable stack is “pulling up” 70 pounds total. I thought that I would just keep progressing to using less and less assistance until I no longer needed any. Unfortunately, that is not the way it worked, and I have not met anyone who has progressed to a bodyweight pull-up by using the Gravitron alone. However, I think this is a great machine to work with because it starts to get you used to the motion of pulling yourself up through the air, and really learning a proper range of motion from the get-go.
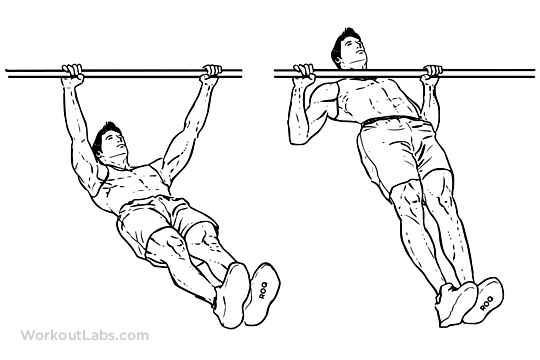 Inverted Row: The inverted row is another fantastic bodyweight exercise that gets you more comfortable with pulling up your own body weight, albeit in a horizontal plane. Because your feet stay on the ground (or on a bench as you become more advanced with this), it is easier than a pull-up. It does strengthen the rhomboids and mid-back, and because of the nature of the motion, it encourages you to keep your chest up while you row, which is an important skill to have when executing a perfect pull-up.
Rack Chins: A rack chin is very similar to an inverted row, but your torso remains vertical, so it is more similar to a pull-up and targets the lats more. To start, you can keep your feet on the floor, but as that becaomes easier, you will prop your feet up on a bench. When that becomes easier, you can even add a dumbbell to your lap. Here is my 15 second tutorial on rack chins from my Instagram page.
Negative Pull-ups: A negative pull-up is basically a way to overload your muscles with more weight than they can handle, but only on the way back down, or the eccentric part of the movement. To do your first negatives, start with and inward, palms facing each other, grip as it is easier than a wide, palms forward grip. Climb on a stool or a box, and grasp the pull-up bar handles. Jump all the way to the top of a pull-up position and slooooowwwwwlllllyyyyy lower yourself all the way to a dead hang before stepping back on to the box. Take about 30 seconds and do it again. When learning to do a pull-up, I liked to end every back workout with about 5 of these, the slower, the better. As these get easier, you can start using a wider overhand grip as well.
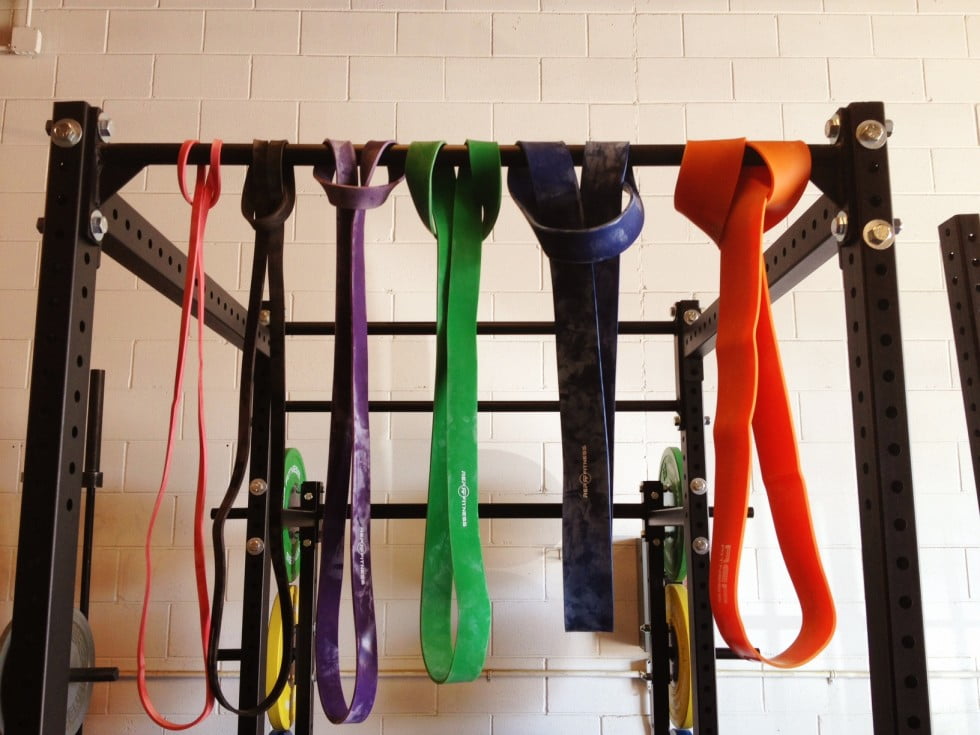 Iron Woody Bands: Ok, these were the ultimate game changer for me. Iron Woody Bands, found here, are basically very, very strong resistance bands, some offering over 100 pounds of resistance. In the case of a pull-up, you hook them onto the pull-up bar, and put your foot or your knee in the loop and use them as assistance. Although upon first glance, it may seem that this is the same as an assisted pull-up, but once you do them both, you feel how different they are.
The Gravitron offers you constant assistance from the bottom of the pull-up all the way to the top. The bands however, offer you more assistance at the bottom of the pull-up, where most people need the help most. As you raise yourself, the band becomes more slack, and you are lifting more of your own bodyweight at the top. Aside from this, the feeling of pulling yourself up using the bands is much closer to the feeling of doing an actual pull-up than the Gravitron. Also, because the bands come in many resistances, you can adjust to less resistance as you become stronger (you can also adjust by either using your foot in the loop, which is easier, or your knee in the loop, which is harder), and unlike the Gravitron, once you are using very little resistance with the bands, it is a short step to doing a full pull-up on your own.
Doing Your First Pull-up: Although a proper pull-up should be executed from a dead hang, there is no shame in your first several pull-ups being started with a slight bend to your arms. The hang will come with time. I suggest starting with an inward facing, or neutral grip, with slightly bent arms. Take a deep breath, brace your core, and pull! Be sure to keep your chest up, and try to get your chin above your hands before coming back down. If you succeeded, awesome! If not, no worries. Just keep at it, and eventually, it’s going to happen. The most important thing to remember is: do not give up. If you quit, you will most definitely not be doing a pull-up any time soon, but if you keep at it, it’s only a matter of time.
Pull-up Progression Back Workout
1. Band Assisted Neutral Grip Pull-ups. 4 sets: 12/10/8/6 reps (each “/” is a new set) decreasing assistance each set.
2. Inverted Row. 4 sets of 8-10 reps. *If ten reps is easy with your feet on the floor, elevate them to a bench. Once this becomes easier (aka, you feel like you could do more than 10 reps for each set), switch to Rack Chins.
3. Lat Pulldown. Wide Grip or Close Grip, alternate each week. 4 sets: 12/10/8/6 reps increasing the weight each set.
4. Wide Grip Assisted Pull-up Machine/Gravitron: 3 sets of 12-15 reps each set. Focus on great form and a full range of motion.
5. Seated Cable Row. 3 sets of 12 reps.
6. Negative Pull-ups. 1 set of 5 reps.


1 Comment. Leave new
Thanks for a great article, Dani! Doing a pull-up (or two, or five) has always been my dream. I used to have zero upper body strength, and things have gotten better in the past year or two with some tweaks in my training routine, but there’s still a long way to go for me. By the way, it was great to meet you guys at Seattle VegFest a few weeks ago, thanks for coming out to the great Pacific Northwest!